How to Make a Fidget Spinner in Tinkercad: A Complete Step-by-Step Guide
- 1. Introduction to Tinkercad and Fidget Spinners
- 2. Getting Started with Tinkercad: Basic Tools
- 3. Designing the Fidget Spinner Body
- 4. Creating the Spinner's Axle and Bearings
- 5. Finalizing the Design for 3D Printing
- 6. Tips for Success and Troubleshooting
1. Introduction to Tinkercad and Fidget Spinners
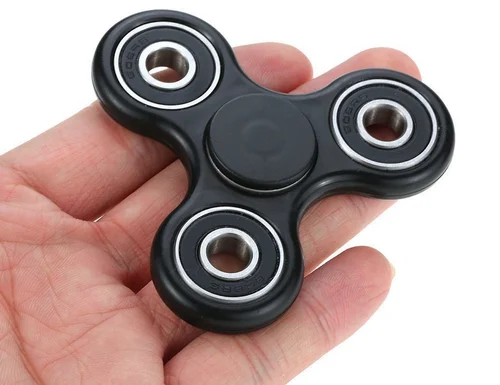
In this guide, we'll walk you through the process of creating a custom fidget spinner in Tinkercad, a user-friendly 3D design and modeling tool. Whether you're a beginner or an experienced designer, Tinkercad offers the perfect platform for experimenting with shapes and designs. Fidget spinners, which gained massive popularity in recent years, are fun, simple toys that can be designed and customized in many ways. Creating one in Tinkercad not only allows you to unleash your creativity but also helps you learn 3D design basics.
2. Getting Started with Tinkercad: Basic Tools
Before diving into the design process, it's essential to familiarize yourself with the basic tools in Tinkercad. First, create a free account at Tinkercad.com. Once you’re logged in, you’ll find an intuitive workspace where you can design your objects. The key tools for designing a fidget spinner include:
- Shape Tool: This allows you to drag and drop basic shapes like circles, squares, and rectangles into your workspace.
- Align Tool: Helps you align different components symmetrically, which is crucial for spinner balance.
- Group Tool: Combines different shapes into a single object, simplifying the design process.
- Hole Tool: Allows you to cut out sections from objects, like the central hole for the axle.
Once you’re comfortable with these tools, you’re ready to start designing your fidget spinner!
3. Designing the Fidget Spinner Body
The first step in creating a fidget spinner in Tinkercad is designing the spinner body. Start by dragging a circle shape onto the workspace. Scale it to the desired size—typically, a fidget spinner body is about 3 inches in diameter. You can adjust the thickness depending on how heavy you want the spinner to be.
To make the arms of the spinner, drag smaller rectangles onto the body and align them around the central circle. Be sure to position them symmetrically to ensure the spinner remains balanced. You can experiment with different arm shapes and sizes to customize your design.
Once the body and arms are in place, you can refine the design by adding details such as grooves or patterns for a more unique look. Don't forget to smooth out the edges to ensure a better finish for 3D printing!
4. Creating the Spinner's Axle and Bearings
Now it’s time to add the central axle and bearing holes. In a traditional fidget spinner, the bearings help it spin smoothly, but since we are designing without actual bearings, we’ll simulate the concept.
For the axle, you’ll need a thin cylinder that fits snugly into the center of the spinner body. Drag a cylinder shape into the workspace and resize it to fit the center of the spinner. This will act as the central spinning mechanism. Use the hole tool to cut a small hole in the center of the body for the axle to fit through.
To simulate the bearing effect, you can create two small, thin cylinders that fit around the axle, positioned within the arms. These will help reduce friction and guide the spinner as it spins.
5. Finalizing the Design for 3D Printing
Once the body, arms, axle, and bearing holes are in place, you’re ready to finalize your design. Ensure all parts are properly aligned using the align tool and group everything into a single object using the group tool. This will ensure that your fidget spinner prints as one piece without any parts shifting during the printing process.
Next, export your design as an STL file, which is compatible with most 3D printers. If you don’t have a 3D printer at home, you can use a 3D printing service or find a local maker space to print your design.
6. Tips for Success and Troubleshooting
As you work through the design, here are a few tips to keep in mind:
- Balance is Key: Make sure the spinner arms are symmetrically placed around the center. This ensures a smoother spin.
- Avoid Over-Complicating the Design: Simple designs often work best for fidget spinners. Keep it clean and functional.
- Check for Errors: Before exporting your design, use the Tinkercad inspector to check for any issues with your model, such as holes or misaligned parts.
With a little patience and creativity, you'll have a custom-designed fidget spinner that you can print and enjoy!
Ready to Create Your Own Fidget Spinner?
If you're eager to take your fidget spinner designs to the next level, check out our collection of high-quality spinners at Fidget Spinner. Whether you're into DIY or looking for a ready-made spinner, we have something for every type of spinner enthusiast. Start designing today and discover your perfect spinner!